Table of Contents
Hello everyone, welcome to this new article where we are going to explore how to make a Sortable React Native Table.
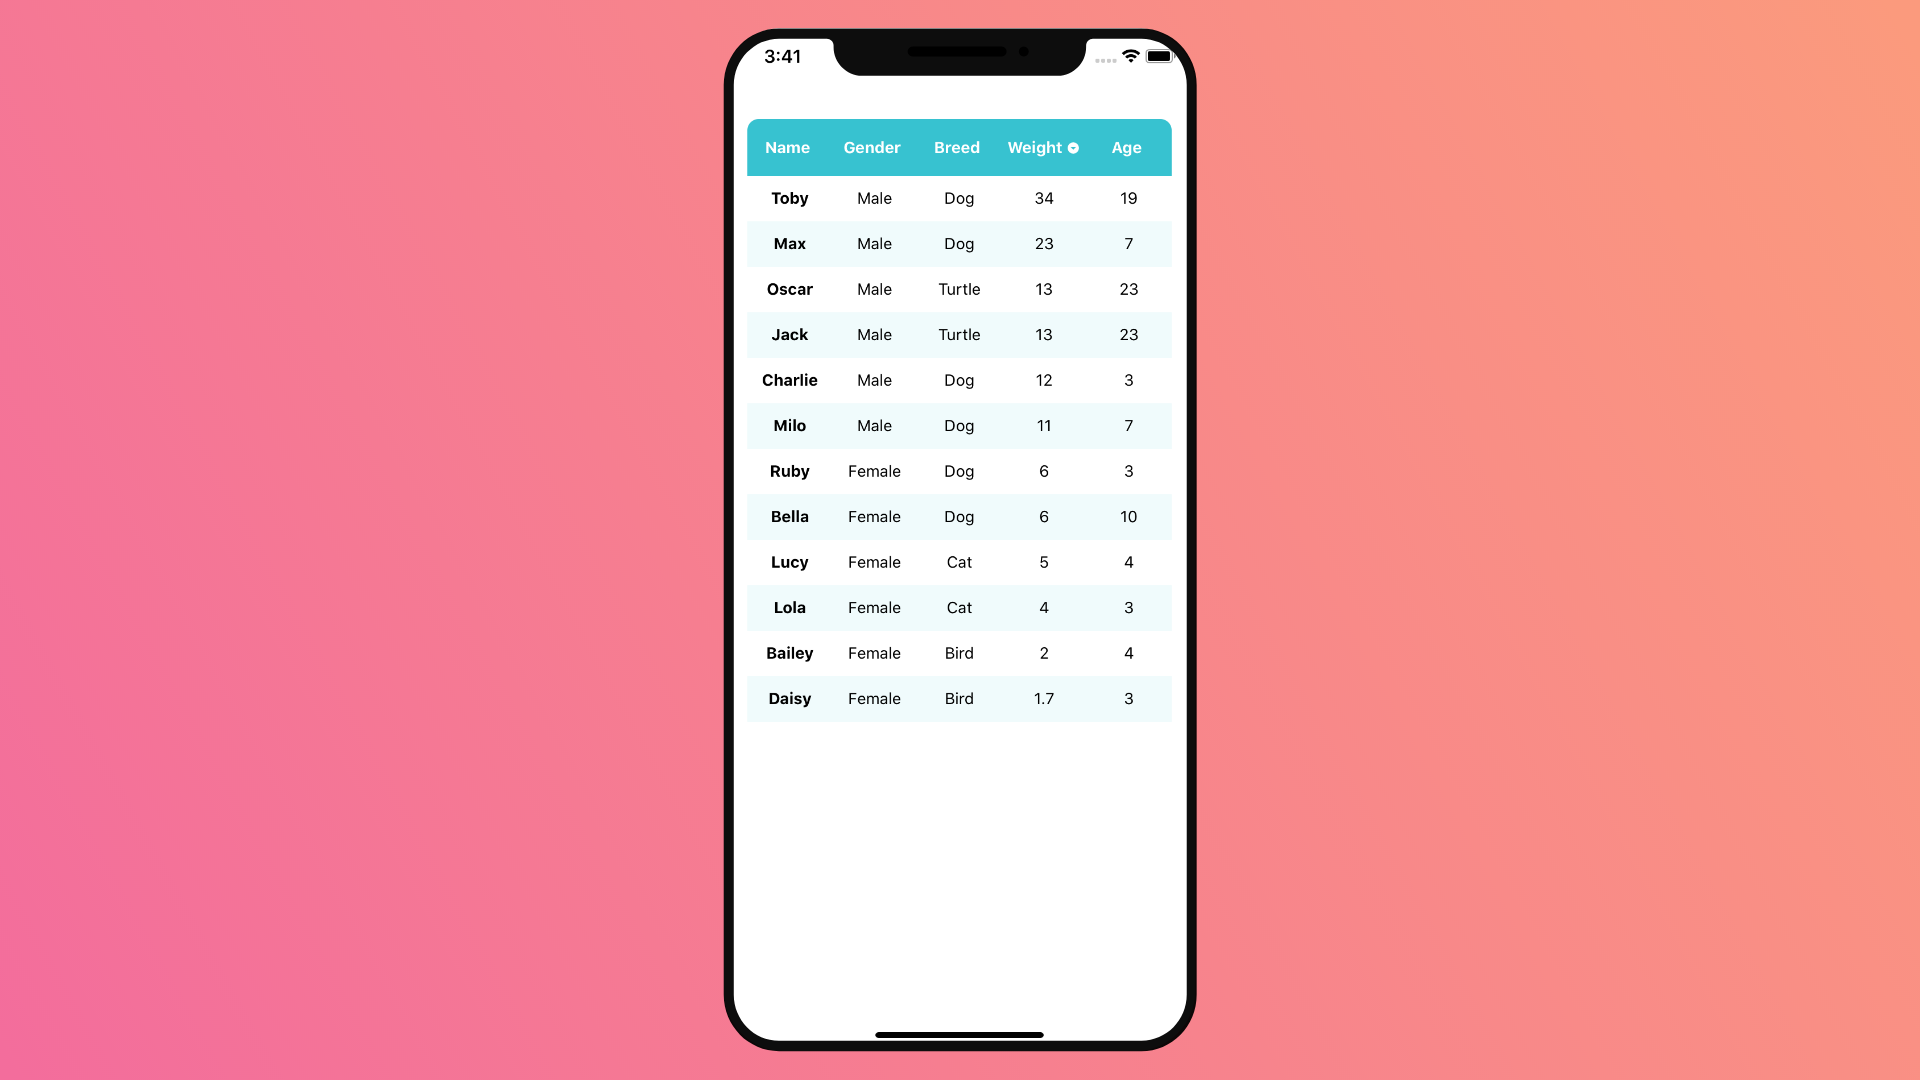
In that process we will be making a Pet resort app, showing the list of available pets, by name, gender, age, breed, weight and age.
We will be displaying the list as a table form, similar to the web version with an elegant design and we will also add the functionality to sort the table by ascending and descending order with an icon indicator.
We will be using the React Native Flatlist to make the Table, since there is no native table concept in mobile applications.
The final result will look like this.


Environment Setup
To build our Sortable React Native Table, we will need few things.
The Flatlist Component
It comes by default with the React Native Library, wether you are using Expo or React Native CLI.
Check my previous React Native Flatlist Example
React Native Icons
We need to use The React Native Icons package to add the sorting order indicator.
If you are using Expo, you should have it by default within the Expo Library. All you will need is to import it.
In React Native CLI however, you will need to install it via NPM or YARN.
yarn add react-native-vector-iconsCheck my previous article on how to use React Native Ionicons if it’s the first time to come across it.
Lodash library
We will need lodash library to use with React Native Table to handle the sorting functionality. As it comes with handy data manipulation tools such as arrays and objects.
Our need is for the orderBy function, to sort our data table by ascending and descending order.
You can installing directly via NPM or YARN.
yarn add lodashBuilding The React Native Table
Data Table
For this app, I have prepared a JSON file with a list of pets and its data that we can use. We need to add it to the state using the useState hook.
const [ pets, setPets ] = useState([
    {
      Name: "Charlie",
      Gender: "Male",
      Breed: "Dog",
      Weight: 12,
      Age: 3
    },
    {
      Name: "Max",
      Gender: "Male",
      Breed: "Dog",
      Weight: 23,
      Age: 7
    },
    {
      Name: "Lucy",
      Gender: "Female",
      Breed: "Cat",
      Weight: 5,
      Age: 4
    },
    {
      Name: "Oscar",
      Gender: "Male",
      Breed: "Turtle",
      Weight: 13,
      Age: 23
    },
    {
      Name: "Daisy",
      Gender: "Female",
      Breed: "Bird",
      Weight: 1.7,
      Age: 3
    },
    {
      Name: "Ruby",
      Gender: "Female",
      Breed: "Dog",
      Weight: 6,
      Age: 3
    },
    {
      Name: "Milo",
      Gender: "Male",
      Breed: "Dog",
      Weight: 11,
      Age: 7
    },
    {
      Name: "Toby",
      Gender: "Male",
      Breed: "Dog",
      Weight: 34,
      Age: 19
    },
    {
      Name: "Lola",
      Gender: "Female",
      Breed: "Cat",
      Weight: 4,
      Age: 3
    },
    {
      Name: "Jack",
      Gender: "Male",
      Breed: "Turtle",
      Weight: 13,
      Age: 23
    },
    {
      Name: "Bailey",
      Gender: "Female",
      Breed: "Bird",
      Weight: 2,
      Age: 4
    },
    {
      Name: "Bella",
      Gender: "Female",
      Breed: "Dog",
      Weight: 6,
      Age: 10
    }
  ])
We will also need to add few states to our app to handle different Table data. Such as the selectedColumn, Direction of the sort e.g Ascending and Descending and the list of Table Header Columns.
  const [ columns, setColumns ] = useState([
    "Name",
    "Gender",
    "Breed",
    "Weight",
    "Age"
  ])
  const [ direction, setDirection ] = useState(null)
  const [ selectedColumn, setSelectedColumn ] = useState(null)
Table View Using Flatlist
As I have mentioned, we are going to use the flatlist component to make our Table In React Native. We will add few props configurations and everything will be set.
ListHeaderComponent: The Flatlists header component, which will serve as our table component.
stickyHeaderIndices: Prop to make the Table Header stick and not scroll when we are scrolling through the data table rows.
<FlatList
  data={pets}
  style={{width:"90%"}}
  keyExtractor={(item, index) => index+""}
  ListHeaderComponent={tableHeader}
  stickyHeaderIndices={[0]}
  renderItem={({item, index})=> {
    return (
      <View style={{...styles.tableRow, backgroundColor: index % 2 == 1 ? "#F0FBFC" : "white"}}>
        <Text style={{...styles.columnRowTxt, fontWeight:"bold"}}>{item.Name}</Text>
        <Text style={styles.columnRowTxt}>{item.Gender}</Text>
        <Text style={styles.columnRowTxt}>{item.Breed}</Text>
        <Text style={styles.columnRowTxt}>{item.Weight}</Text>
        <Text style={styles.columnRowTxt}>{item.Age}</Text>
      </View>
    )
  }}
/>
Adding A Table View Header
Using the column list we setup in the state, we will map through it and add Table Header Columns.
  const tableHeader = () => (
    <View style={styles.tableHeader}>
      {
        columns.map((column, index) => {
          {
            return (
              <TouchableOpacity
                key={index}
                style={styles.columnHeader}
                onPress={()=> sortTable(column)}>
                <Text style={styles.columnHeaderTxt}>{column + " "}
                  { selectedColumn === column && <MaterialCommunityIcons
                      name={direction === "desc" ? "arrow-down-drop-circle" : "arrow-up-drop-circle"}
                    />
                  }
                </Text>
              </TouchableOpacity>
            )
          }
        })
      }
    </View>
  )
Here we have two interesting things happening, the onPress function of the component, which will call the sortTable() Function to re-sort the table according to the new order.
And Column Sorting order icon, which we took from MaterialCommunityIcons, based on the Direction of sorting.
Sorting Data Table Function
In this function we will be updating the state with the new data from the table column click, and sorting the data table using the lodash function _.orderBy().
  const sortTable = (column) => {
    const newDirection = direction === "desc" ? "asc" : "desc"
    const sortedData = _.orderBy(pets, [column],[newDirection])
    setSelectedColumn(column)
    setDirection(newDirection)
    setPets(sortedData)
  }
Result
Full Code
import { StatusBar } from 'expo-status-bar';
import React, { useState, useEffect } from 'react';
import { StyleSheet, Text, View, FlatList, TouchableOpacity } from 'react-native';
import { MaterialCommunityIcons } from '@expo/vector-icons';
import _ from "lodash"


export default function App() {
  const [ columns, setColumns ] = useState([
    "Name",
    "Gender",
    "Breed",
    "Weight",
    "Age"
  ])
  const [ direction, setDirection ] = useState(null)
  const [ selectedColumn, setSelectedColumn ] = useState(null)
  const [ pets, setPets ] = useState([
    {
      Name: "Charlie",
      Gender: "Male",
      Breed: "Dog",
      Weight: 12,
      Age: 3
    },
    {
      Name: "Max",
      Gender: "Male",
      Breed: "Dog",
      Weight: 23,
      Age: 7
    },
    {
      Name: "Lucy",
      Gender: "Female",
      Breed: "Cat",
      Weight: 5,
      Age: 4
    },
    {
      Name: "Oscar",
      Gender: "Male",
      Breed: "Turtle",
      Weight: 13,
      Age: 23
    },
    {
      Name: "Daisy",
      Gender: "Female",
      Breed: "Bird",
      Weight: 1.7,
      Age: 3
    },
    {
      Name: "Ruby",
      Gender: "Female",
      Breed: "Dog",
      Weight: 6,
      Age: 3
    },
    {
      Name: "Milo",
      Gender: "Male",
      Breed: "Dog",
      Weight: 11,
      Age: 7
    },
    {
      Name: "Toby",
      Gender: "Male",
      Breed: "Dog",
      Weight: 34,
      Age: 19
    },
    {
      Name: "Lola",
      Gender: "Female",
      Breed: "Cat",
      Weight: 4,
      Age: 3
    },
    {
      Name: "Jack",
      Gender: "Male",
      Breed: "Turtle",
      Weight: 13,
      Age: 23
    },
    {
      Name: "Bailey",
      Gender: "Female",
      Breed: "Bird",
      Weight: 2,
      Age: 4
    },
    {
      Name: "Bella",
      Gender: "Female",
      Breed: "Dog",
      Weight: 6,
      Age: 10
    }
  ])

  const sortTable = (column) => {
    const newDirection = direction === "desc" ? "asc" : "desc"
    const sortedData = _.orderBy(pets, [column],[newDirection])
    setSelectedColumn(column)
    setDirection(newDirection)
    setPets(sortedData)
  }
  const tableHeader = () => (
    <View style={styles.tableHeader}>
      {
        columns.map((column, index) => {
          {
            return (
              <TouchableOpacity
                key={index}
                style={styles.columnHeader}
                onPress={()=> sortTable(column)}>
                <Text style={styles.columnHeaderTxt}>{column + " "}
                  { selectedColumn === column && <MaterialCommunityIcons
                      name={direction === "desc" ? "arrow-down-drop-circle" : "arrow-up-drop-circle"}
                    />
                  }
                </Text>
              </TouchableOpacity>
            )
          }
        })
      }
    </View>
  )

  return (
    <View style={styles.container}>
      <FlatList
        data={pets}
        style={{width:"90%"}}
        keyExtractor={(item, index) => index+""}
        ListHeaderComponent={tableHeader}
        stickyHeaderIndices={[0]}
        renderItem={({item, index})=> {
          return (
            <View style={{...styles.tableRow, backgroundColor: index % 2 == 1 ? "#F0FBFC" : "white"}}>
              <Text style={{...styles.columnRowTxt, fontWeight:"bold"}}>{item.Name}</Text>
              <Text style={styles.columnRowTxt}>{item.Gender}</Text>
              <Text style={styles.columnRowTxt}>{item.Breed}</Text>
              <Text style={styles.columnRowTxt}>{item.Weight}</Text>
              <Text style={styles.columnRowTxt}>{item.Age}</Text>
            </View>
          )
        }}
      />
      <StatusBar style="auto" />
    </View>
  );
}

const styles = StyleSheet.create({
  container: {
    flex: 1,
    backgroundColor: '#fff',
    alignItems: 'center',
    justifyContent: 'center',
    paddingTop:80
  },
  tableHeader: {
    flexDirection: "row",
    justifyContent: "space-evenly",
    alignItems: "center",
    backgroundColor: "#37C2D0",
    borderTopEndRadius: 10,
    borderTopStartRadius: 10,
    height: 50
  },
  tableRow: {
    flexDirection: "row",
    height: 40,
    alignItems:"center",
  },
  columnHeader: {
    width: "20%",
    justifyContent: "center",
    alignItems:"center"
  },
  columnHeaderTxt: {
    color: "white",
    fontWeight: "bold",
  },
  columnRowTxt: {
    width:"20%",
    textAlign:"center",
  }
});
I hope you enjoyed reading this article, And found it as informative as you have expected.
I will be adding it to Github and Expo.io, feel free to use it and share it with your friends at your will.
Stay safe and happy coding.
Tks for your post. It help me a lot.
Thank you for reading my article. I am really happy it helped someone.
Very useful, thanks for posting.
thank you, helpful info.
thank you sir