Table of Contents
Good evening everyone and welcome into my new article React Native Login Screen Tutorial.
Where we are going to explore the process of making a login screen in react native.
let’s get started
Concept UI
Most modern apps login screen, will usually have a Logo image or text.
Input texts for the email or username and password.
A login Button to submit the authentication.
And complementary actions such as forgot password, and Signup.
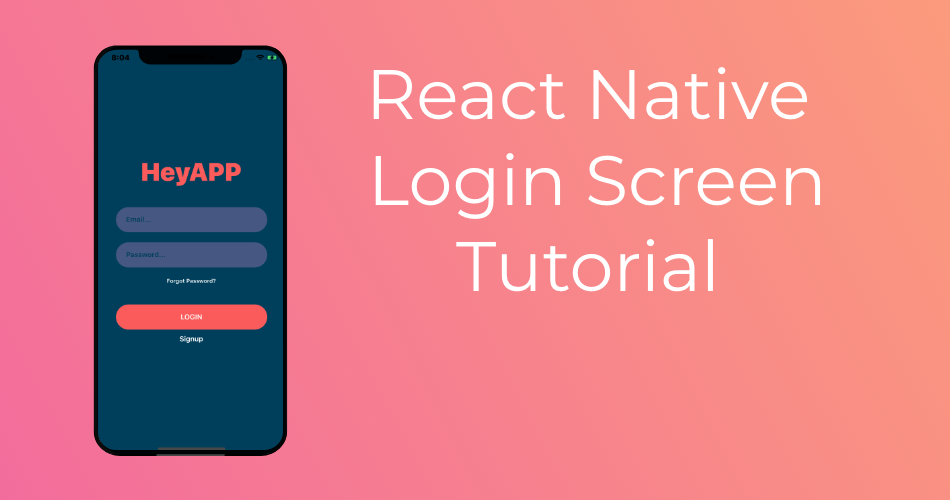
Our final result will look like this.

Let’s Get Started
Let’s get started by creating a new react native project either using Expo or React Native CLI.
With both approaches, you will usually get a starting code like this.

import React from 'react';
import { StyleSheet, Text, View } from 'react-native';

export default class App extends React.Component {
  render(){
    return (
      <View style={styles.container}>
        <Text>Open up App.js to start working on your app!</Text>
      </View>
    );
  }
}

const styles = StyleSheet.create({
  container: {
    flex: 1,
    backgroundColor: '#fff',
    alignItems: 'center',
    justifyContent: 'center',
  },
});
I will get started by removing the Text view inside our root view in the render Method.
We will int into a React Native stateful component by adding a simple state properties to hold the email and password of from our UI
  state={
    email:"",
    password:""
  }
One this I will change on the root view container style is the background, everything else looks good.
  container: {
    flex: 1,
    backgroundColor: '#003f5c',
    alignItems: 'center',
    justifyContent: 'center',
  }
For the UI side let’s start by working on the Logo Text.
It’s a simple TextView, you can also add an image there. Both options are perfect.
<View style={styles.inputView} >Logo text style
  logo:{
    fontWeight:"bold",
    fontSize:50,
    color:"#fb5b5a",
    marginBottom:40
  }
For the textInput fields, I am going to make a view then add them inside,
This way we can have styling separate.
And also room to add icons or indicators etc, I am not adding any for this tutorial for simplicity.
Each input item will look like this.
        <View style={styles.inputView} >
          <TextInput
            style={styles.inputText}
            placeholder="Email..."
            placeholderTextColor="#003f5c"
            onChangeText={text => this.setState({email:text})}/>
        </View>
React native securetextentry for passwords
For the Password textInput add the prop secureTextEntry to have the stars hiding the password instead of plain text.
Also, change the onChangeText property to save the text to password state property instead of email
Add this style to the input view
  inputView:{
    width:"80%",
    backgroundColor:"#465881",
    borderRadius:25,
    height:50,
    marginBottom:20,
    justifyContent:"center",
    padding:20
  }
and the textInput style
  inputText:{
    height:50,
    color:"white"
  }
Now lets add the Forgot password View,
It’s a simple Text inside a button to have the press functionality, you cannot add bare text.
        <TouchableOpacity>
          <Text style={styles.forgot}>Forgot Password?</Text>
        </TouchableOpacity>
Forgot text style
  forgot:{
    color:"white",
    fontSize:11
  }
Same thing goes for the signup text. just changing the text size
        <TouchableOpacity>
          <Text style={styles.loginText}>Signup</Text>
        </TouchableOpacity>
And finally the Login Button.
        <TouchableOpacity style={styles.loginBtn}>
          <Text style={styles.loginText}>LOGIN</Text>
        </TouchableOpacity>
It’s style is a bit different and mostly centralized around the button.
  loginBtn:{
    width:"80%",
    backgroundColor:"#fb5b5a",
    borderRadius:25,
    height:50,
    alignItems:"center",
    justifyContent:"center",
    marginTop:40,
    marginBottom:10
  },
Now out app looks like this.

And there you have it a simple elegant React Native Login Screen tutorial.
I have prepared both a github project and an Expo.io if you would like to work on the project or test it.

Hello, I dont know what’s wrong when I try to create another Login.js component file and after that in App.js just add to the I lost all the style and all the elements are up on the screen, it is showed almost empty all the screen.
Do you have idea how to do it? Thanks
Hi Nicolas, Thanks for your comment.
I think I can help you debug your problem contact me and let’s take a look at it.
Join me on facebook https://www.facebook.com/ReactNativeMaster or via email ellhydra1@gmail.com
How does this actually work with state across the app?
You would most likely use redux for authentication process, or make your own state management workflow.
Impressive! Thanks for the article.
Best regards,
Thompson Duke
hi youssef im hamza i just wanna know that you put the code in pieces so im confused that which part should be where so tell this thing how to write this code of login screen . Thanks!
Hi Hamza, I was working on one part at a time, you can see the full code from the github repository.
Hi, Im a beginner in react native and i have a question regarding, this lesson, where and how do i place state={
email:””,
password:””
}
cause each time i put it in my code it keeps giving me error when i try to type any email or password?
You can put it just before the render() method
Nice Login Screen
where can I view the entire code
Here,
https://github.com/Alhydra/React-Native-Login-Screen-Tutorial
I like your example. I’m learning react and this is one of the most simple examples i’ve seen thanks.