Table of Contents
Hello again, welcome to this new article, where we are going React Native Geolocation Example.
In this article we are going to explore how to setup and consume the Location API from Expo.
By making a simple app screen similar to most weather apps, with a background image, and Geolocation text.
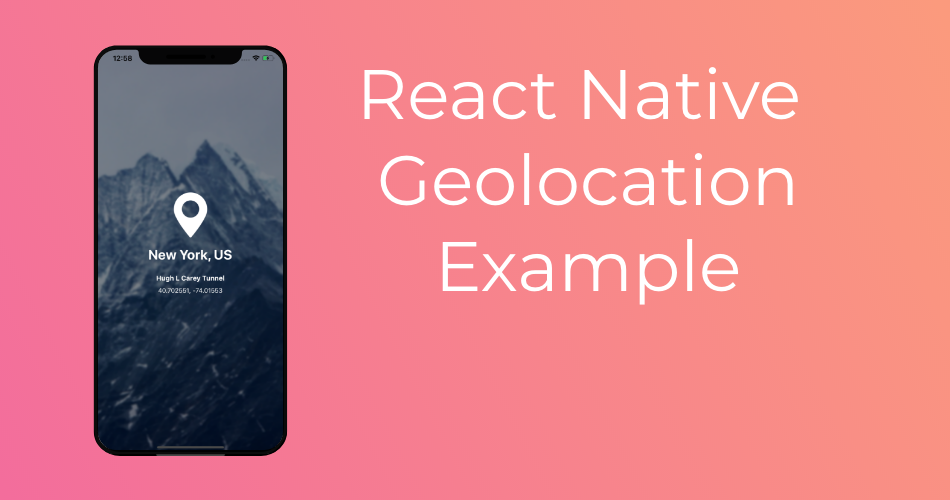
This is the result

As you see in the screen, we are going to consume the React Native Geolocation API to extract the Coordinates, City, Country and Street Address.
Let’s get Started
First we will need to install some Expo packages. Both expo-location and expo-permissions
expo install expo-locationexpo install expo-permissionsThen import both of them into your app.js or whatever file you are using them in.
import * as Location from 'expo-location';
import * as Permissions from 'expo-permissions';
Starting by our initial state, we will add location, geocode and error message properties.
  state= {
    location:null,
    geocode:null,
    errorMessage:""
  }
getLocationAsync
getLocationAsync will be our main function to handle location extraction and permissions.
It should look something like this.
  getLocationAsync = async () => {
    let { status } = await Permissions.askAsync(Permissions.LOCATION);
    if (status !== 'granted') {
      this.setState({
        errorMessage: 'Permission to access location was denied',
      });
    }

    let location = await Location.getCurrentPositionAsync({accuracy:Location.Accuracy.Highest});
    const { latitude , longitude } = location.coords
    this.getGeocodeAsync({latitude, longitude})
    this.setState({ location: {latitude, longitude}});

  };
The first line, asks for user location permissions, using expo-permissions Permissions.askAsync.
Then if the permission status is granted it will continue to get the location data, else it will state the Permission to access location was denied error message.
Next, the function will use expo-location getCurrentPositionAsync function to get the location data.
Notice, the function takes an object argument including the Geolocation Accuracy.
It has multiple values, depending on your accuracy requirement.
| Accuracy | Value | Description |
|---|---|---|
Accuracy.Lowest | 1 | Accurate to the nearest three kilometers. |
Accuracy.Low | 2 | Accurate to the nearest kilometer. |
Accuracy.Balanced | 3 | Accurate to within one hundred meters. |
Accuracy.High | 4 | Accurate to within ten meters of the desired target. |
Accuracy.Highest | 5 | The best level of accuracy available. |
Accuracy.BestForNavigation | 6 | The highest possible accuracy that uses additional sensor data to facilitate navigation apps. |
Notice, I am extracting only the latitude and longitude from the returned data, because it has more than just the coordinates.
Saving it to the state, and using the next function we are going to create to extract the getGeocodeAsync data from the location.
getGeocodeAsync
getGeocodeAsync function will be responsible of extracting the geocode geolocation data, from our latitude and longitude coordinates.
By using the expo-location reverseGeocodeAsync function.
It’s pretty straightforward
getGeocodeAsync= async (location) => {
    let geocode = await Location.reverseGeocodeAsync(location)
    this.setState({ geocode})
  }
User Interface
Like I have mentioned in the introduction, we are going to have a background image for our screen, with the geocode and geolocation data displayed.
So we are going to use ImageBackground from react-native.
I have already downloaded the image I will use in the assets folder.
But the image still needs some styling to make it look like the screen.
That being said, There are 2 things to add, a blur effect and blackish tint.
Blurring and Image can be done by simply adding a value to the prop blurRadius, The more value the stronger the blur
And for the black tint. I am going to add a view inside the imagebackground with an alpha background color.
You can either use rgba or hex code for the color.
for this example I am going to use the hex code with alpha value like this.
#00000070The value 70 at the end of the hex code represents the alpha opacity value of 70%, increase or decrease as you wish.
So our render method will be similar to this
render(){
    const {location,geocode, errorMessage } = this.state
    return (
      <ImageBackground  source={require("./assets/bg.jpg")} blurRadius={5} style={styles.container}>
        <View style={styles.overlay}>
          <Image source={require("./assets/marker.png")} style={{width:100,height:100}} />
          <Text style={styles.heading1}>{geocode  ? `${geocode[0].city}, ${geocode[0].isoCountryCode}` :""}</Text>
          <Text style={styles.heading2}>{geocode ? geocode[0].street :""}</Text>
          <Text style={styles.heading3}>{location ? `${location.latitude}, ${location.longitude}` :""}</Text>
          <Text style={styles.heading2}>{errorMessage}</Text>

        </View>
      </ImageBackground>
    );
  }
And finally the styles
const styles = StyleSheet.create({
  container: {
    flex: 1,
    backgroundColor: '#fff',
    alignItems: 'center',
    justifyContent: 'center',

  },
  overlay:{
    backgroundColor:"#00000070",
    height:"100%",
    width:"100%",
    justifyContent:"center",
    alignItems:"center"
  },
  heading1:{
    color:"#fff",
    fontWeight:"bold",
    fontSize:30,
    margin:20
  },
  heading2:{
    color:"#fff",
    margin:5,
    fontWeight:"bold",
    fontSize:15
  },
  heading3:{
    color:"#fff",
    margin:5
  }
});
Final Result
And there you have it a simple React Native Geolocation Example.
I hope you find it as informative as you have expected.
This project will be available on github and Expo.io
Feel free to comment out your questions and concerns don’t be shy.
Thank your for reading my article and happy coding
Hello Youssef
Excellent article but i have a (very beginner) question: I want to use your idea on my project on which i use the google maps api. I don’t know if you are familiar with this api but every time i try to access the location state and use it in the “coordinate” prop on the i get several errors. Here is basically how marker works:
…
Can you provide a way i can access the latitude and longitude values from the location state and assign them to the coordinate prop?
Thank you in advance
Hi Jim,
Sure, I can help you, no problem at all.
I am not quite sure, what you are trying to achieve.
Hi Youssef! Thanks so much for this guide, it’s been really helpful.
However, I tried replacing the getCurrentPositionAsync for watchPositionAsync and in the callback function i put an update to the state in order for the coordinates to update in the view.
In android it works perfectly, getting new positions every 1 second aprox, but in iOS it takes arround 30 seconds to get new positions from the phone’s GPS. I’ve been cracking my head trying to find the error and looking for current bugs in expo-location, but i’ve found nothing.
Do you have any idea what could be happening?
Thank you in advance.
Hi Gabriel, thats normal, I forgot to mention that.
calling it on iOS causes the location manager to obtain a location fix which may take several seconds. Consider using Location.getLastKnownPositionAsync if you expect to get a quick response and high accuracy is not required.
I Youssef.
I have runnin the code y one screen, all fine, but 5 or 6 mins later the position not update more, i try to see if the app crash, but the app is running, the only think is that, the update coordenates stop to run. I have to turn off a run again.
But this issue not can by.
Whan can do?
i copy your code but i error appear location not null
Whats the error?
Hola !
Deseo cambiar la imagen de fondo, podrias decirme que medidas tiene la que estas utilizando? para guiarme.