Table of Contents
Hello everyone, welcome into this article where we are going make a React Native Hooks Example, with simple and good looking UI.
By Building a mobile Url Shortener app.
React Hooks were introduced in React 16.8, and to put it simply, they let you turn stateless component into stateful.
Meaning You can use functional component and still consume State and lifecycle method.
So we will try to build a url shortener app using hooks and exploring all logic behind it.
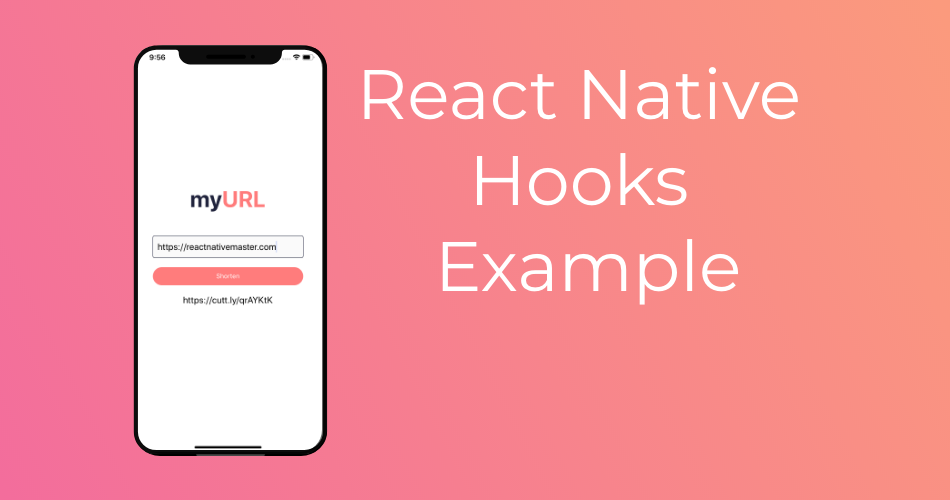
Our final result

Let’s get started
We can get started by making a new React Native project, either by using Expo or React Native Cli.
Whatever the way you go, you will get something like this.

import React from 'react';
import { StyleSheet, Text, View } from 'react-native';

export default class App extends React.Component {
  render(){
    return (
      <View style={styles.container}>
        <Text>Open up App.js to start working on your app!</Text>
      </View>
    );
  }
}

const styles = StyleSheet.create({
  container: {
    flex: 1,
    backgroundColor: '#fff',
    alignItems: 'center',
    justifyContent: 'center',
  },
});
About UseState()
As I have mentioned before, hook will let you use state within a functional component, and useState() is the api Behind it.
First we will need to import it from react.
import React, {useState} from 'react';Then we can use it within our component like this.
const [url, setUrl] = useState("")Whet this means is, define a new state with a variable url and an initial value of en empty string “”, plus a function to update this variable setUrl.
Which is similar to making a new function that updates the particular variable url using this.setState().
You can declare as much variables as you want with any type.
Another example would be
const [todos, setTodos] = useState([{ text: 'Get Milk', done: false }]);Let’s add a new one for the final url
const [finalUrl, setFinalUrl] = useState("")Building Url Shorten App UI
Now that we know how to use hooks, we can start by building the app UI and interact with it using hooks.
The UI will consist of 4 elements, an App logo/ title, a TextInput for the url the user wants to shorten.
Shortening Button and finally the short url result.
Our Render method will look like this.
<View style={styles.container}>
  <Text style={styles.title}>my
    <Text style={{color:"#ff7c7c"}}>URL</Text>
  </Text>
  <TextInput
    style={styles.urlInput}
    onChangeText={text => setUrl(text)}
    value={url}
    placeholder="Enter Your Url"
  />
  <TouchableOpacity  style={styles.ShortenBtn} onPress={()=>shorten()}>
    <Text style={{color:"#fff"}}>Shorten</Text>
  </TouchableOpacity>

  <Text style={styles.finalUrl}>{finalUrl}</Text>


</View>
Notice, The TextInput component, is update the state url by using setUrl that we defined using useState, and also getting the value from the url.
Styles
const styles = StyleSheet.create({
  container: {
    flex: 1,
    backgroundColor: '#fff',
    alignItems: 'center',
    justifyContent: 'center',
  },
  title:{
    color:"#21243d",
    fontWeight:"bold",
    fontSize:50,
    marginBottom:50
  },
  urlInput:{
    height: 50,
    width:"80%",
    borderColor: '#21243d',
    borderWidth: 1,
    borderRadius:5,
    padding:10,
    backgroundColor:"#FAFAFA",
    marginBottom:20,
    fontSize:20
  },
  ShortenBtn:{
    backgroundColor:"#ff7c7c",
    borderRadius:20,
    height:40,
    width:"80%",
    justifyContent:"center",
    alignItems:"center"
  },
  finalUrl:{
    height: 40,
    width:"80%",
    marginTop:20,
    fontSize:20,
    textAlign:"center",
  }
});
Url Shortening
For url shortening, I will be using a free api by cut.ly, to simulate an api call by our app, which we will be needing for our next hook useEffect.
It’s a pretty straight forward GET call, so I will be using fetch.
  const shorten = async ()=>{

    fetch("https://cutt.ly/api/api.php?key=[API-KEY]&short="+url)
    .then(async response => {
      const data = await response.json()
      setFinalUrl(data.url.shortLink)
    })
    .catch(err => {
      console.log(err);
    });

  }
As you can use, the url will have 2 parameters, key for the api key by cut.ly, you can get it by simply making a new free account.
And short which is a string for the url we want to shorten.
Notice that we are getting that url from the useState hook we made earlier.
And once we have the result we use setFinalUrl to update the state with final url from the api.
Once you click the shorten button, everything should be good and you will get a shortened url, Like this.

About UseEffect()
As I have mentioned, hooks let you use both state and lifecycle methods within a functional component.And this is exactly what useEffect() does.
To put it simply, useEffect() is basically componentDidMount, componentDidUpdate, and componentWillUnmount all combined.
In other way, useEffect() is a function that runs whenever something affects your component, either state or prop update etc.
You can use it like this.
  useEffect(() => {
    console.log("Component updated")
  });
But using it this way, will simulate an uncontrolled componentDidUpdate, which will run dozens of time, which we do not want mostly.
So we can add a second argument to useEffect() with the field we want it to run when changes, instead of acting like componentDidUpdate.
To achieve this, you can just add an empty array as a second argument.
useEffect(() => {
    console.log("Component updated")
  },[]);
And if you want it to run only when a state field changes, you can add it to the empty array.
useEffect(() => {
    console.log("Component updated")
  },[url]);
And this is exactly what we want to achieve, in our app. instead of shortening the url when a user presses the button.
We can use useEffect() to shorten the url when the url field changes, as when the user finishes writing the url he wants to shorten.
So our useEffect() now will look, like this.
  useEffect(()=>{
    shorten()
  },[url])
That was it for this article. I hope you find it as informative as you have expected.
Feel free to share it with your friends, and comment out your questions and concerns.
As usual I will add this project to github and expo.io for you to use.
Stay tuned for more.
Happy coding.
great!
thanks you! is very use.